


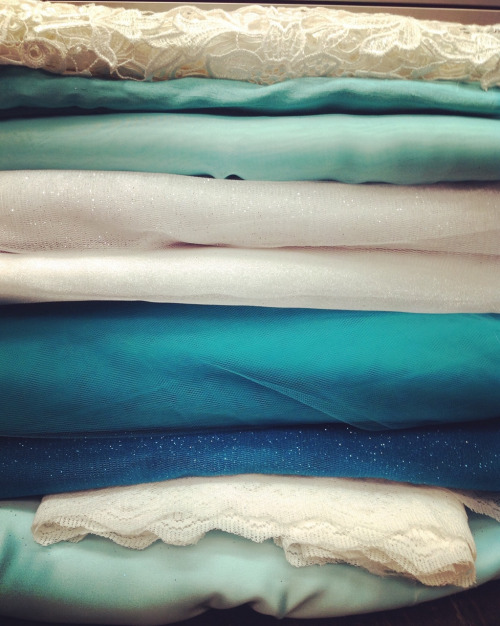
So the time has finally come to start making my daughters wedding dress.
I’m so excited!!! My first pic is of all the fabrics that will be used.
Most of it will be the different gathered layers on the skirt.
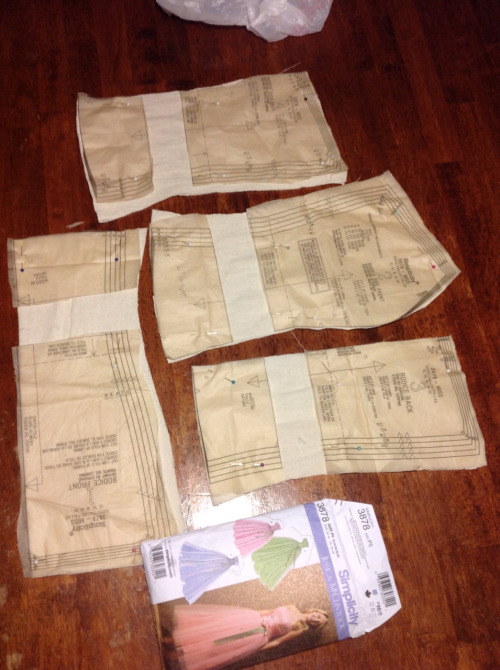
I’m using Simplicity pattern #3878. I am making the bodice 2 inches
longer so the top of the skirt sits just past the top of her hip curve.
She is very full figured so I’ve adjusted the pattern to her size. I’m
starting with a muslin mockup since I only have just enough silk for the
bodice. Once I got this part I can begin the real thing.
The Wedding
So today was the big 4th of July sale at #thesewingstudio in Maitland,
FL. Everything in the store is 40% off. I mean you just can’t pass this
up. We actually made 2 trips to the store. First for the important stuff
like interfacing and stuff like that for work. And the base skirt fabric
for my daughter’s wedding dress. I had a great time shopping with my her
at the store today. I had her specially come up from Bradenton so we
could finish the shopping we needed for her dress for her upcoming
wedding next March. I’m so excited about the fabrics we bought today.
This fabric here in the picture is from our second trip over. We had a
chance, now that the bulk of the morning crowd had gone, to look around
the store with some sanity. I love this store but it does get a bit over
crowded when you put your entire store 40% off. The fabrics are great
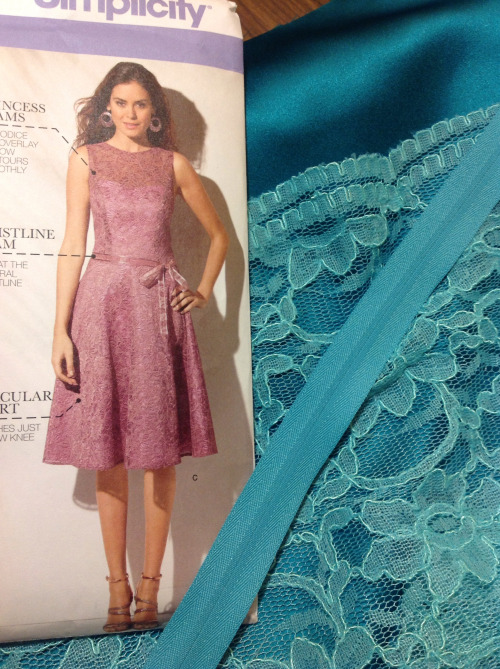
there. This just happens to be the fabric for my mother of the brides
dress and 2 bridesmaid dresses. Mine will be to the floor with long lace
sleeves. The bm’s will be short like the picture with a small cap
sleeve. The colors are beautiful and will really compliment the wedding
dress.
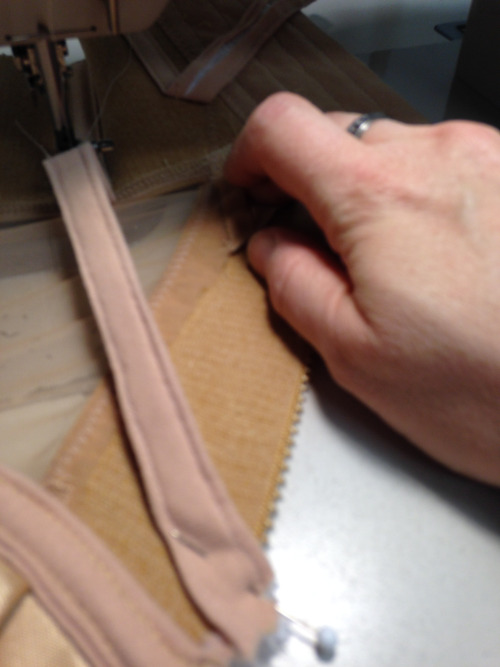
Lowering the back of a bustier bra
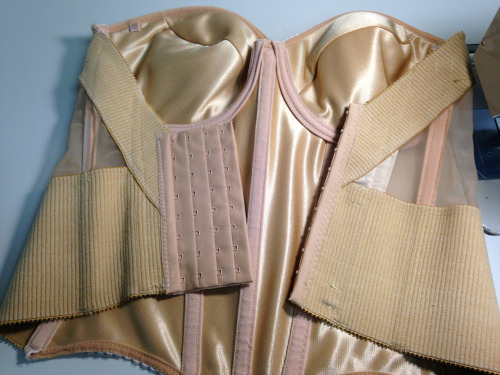
I’m going to take you step by step in lowering the back of a bra such as
this. As you can see in this picture that I have lowered the left side.
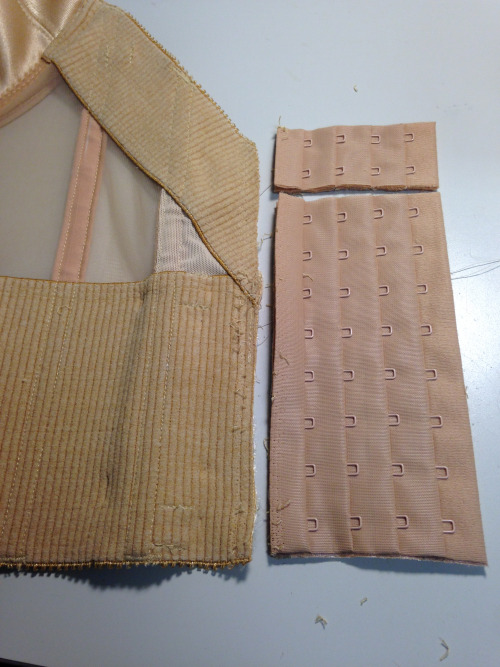
I am taking the waist of this bra in as well so the first thing I’m
going to do is remove the eye band completely. Then I cut the band down
the number of eyes that it needs to be lowered.
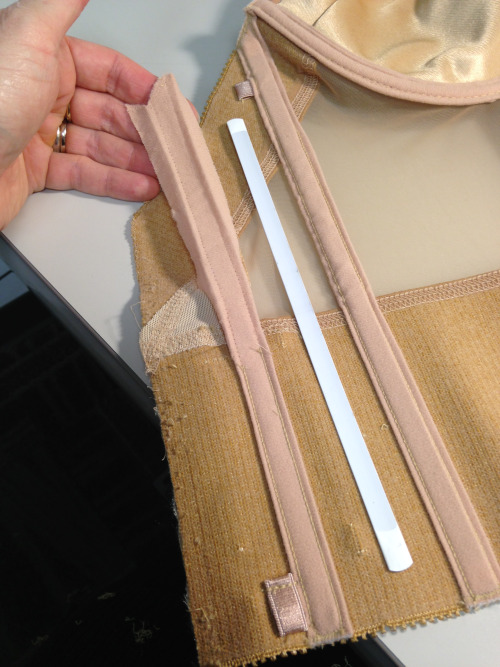
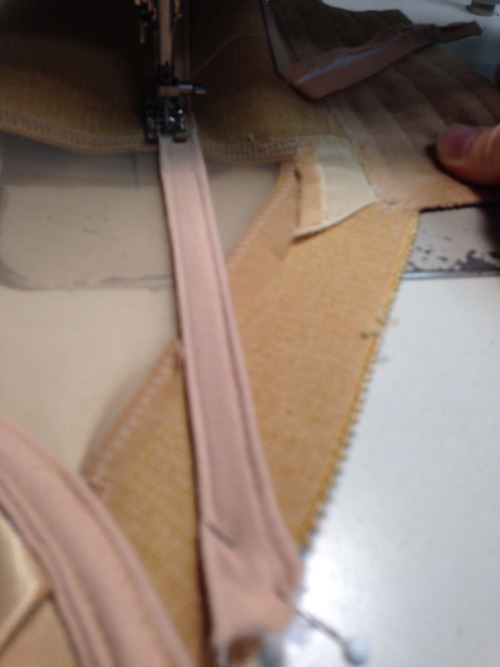
Next I lift the boning covers half way down and remove the stays.
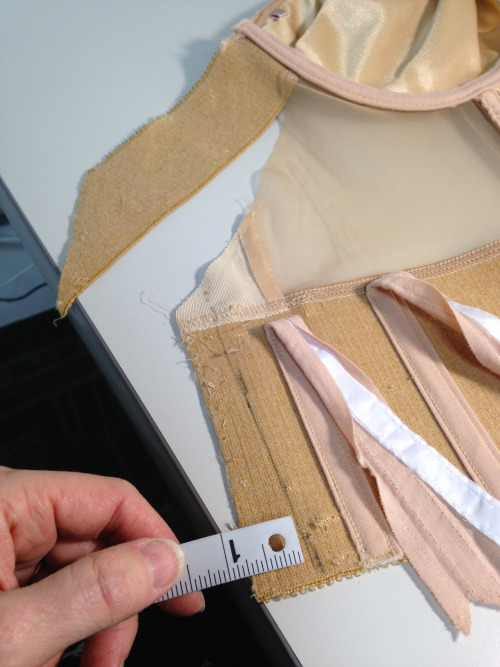
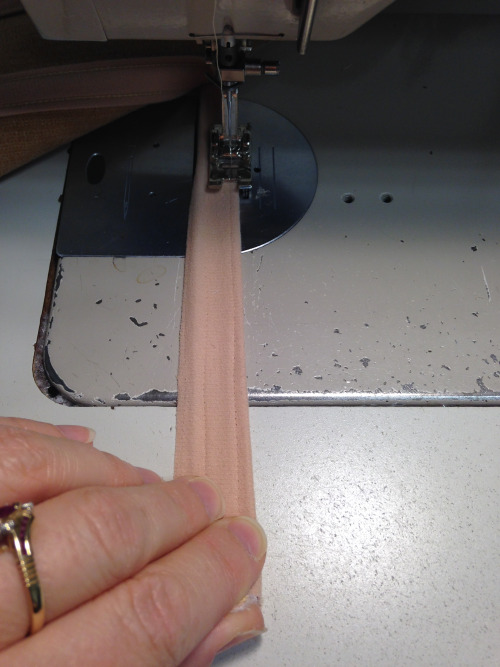
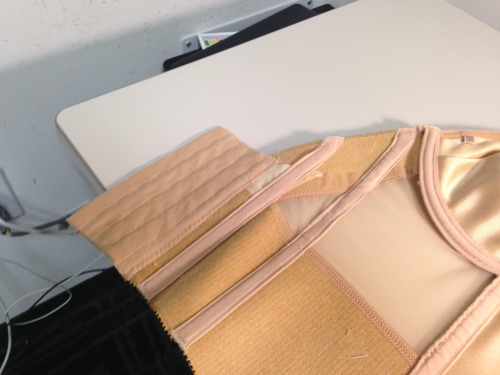
Next lift the elastic all the way to the bust. Here I have marked how
much I need to cut away to take the waist in on this side.
When you attach the elastic back on the top of it needs to line up with
the top of the newly lowered eye band.
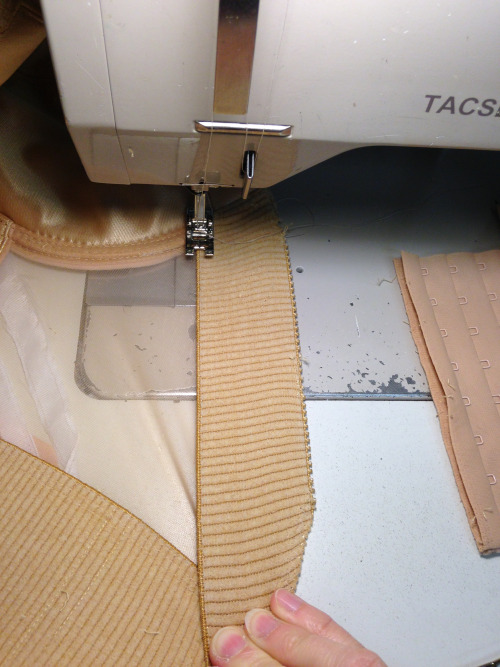
While you stitch the remaining elastic down you need to pull it tight so
as to not restrict the stretch and so the sheer part lays flat.
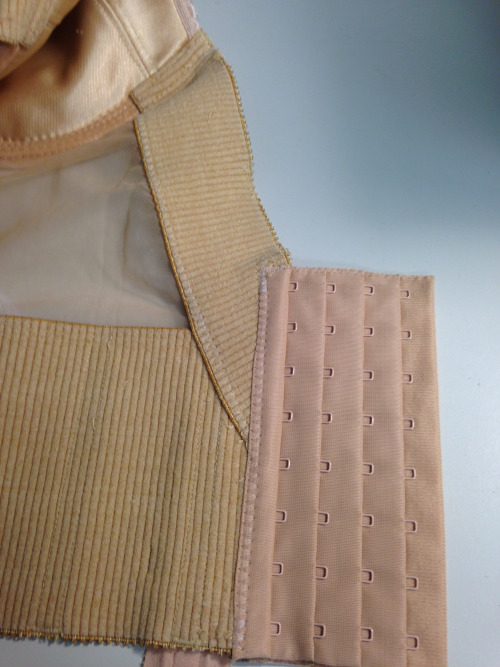
Then stitch the eye band back on and zigzag across the top edge of the
eye band.
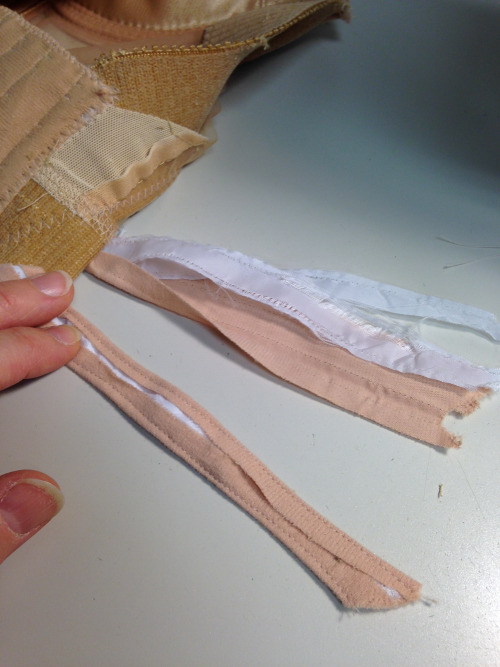
Before I sew down the boning cover back on, I stitch the sides of them.
It makes it so much easier to work with.
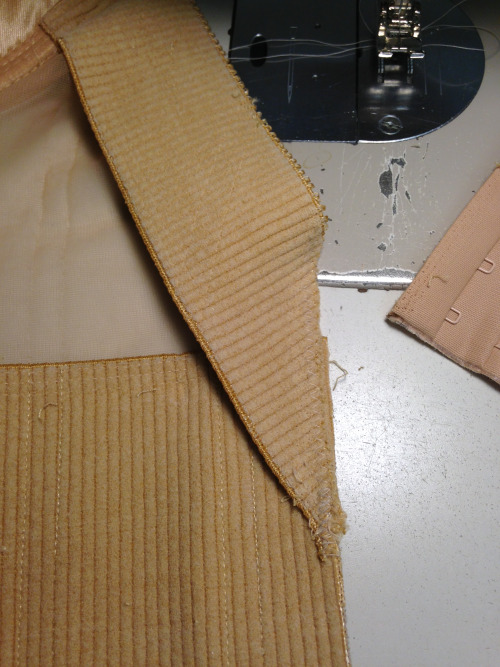
Next pin the end of the boning cover in place. Now remember that we are
lowering the back of the bra so this cover should now extend past the
elastic slightly.
When sewing the cover back on you need to hold both the bust and the eye
band taught so the cover will go on fairly straight.
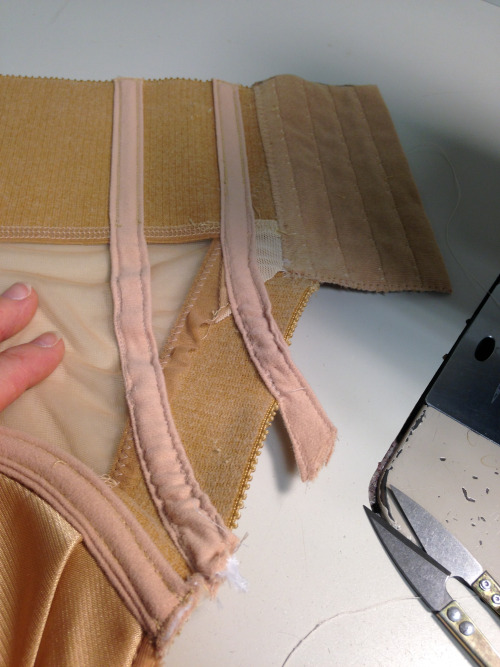
Repeat for the second boning cover. This one will hang over the edge of
the elastic allot more than the one next to the bust.
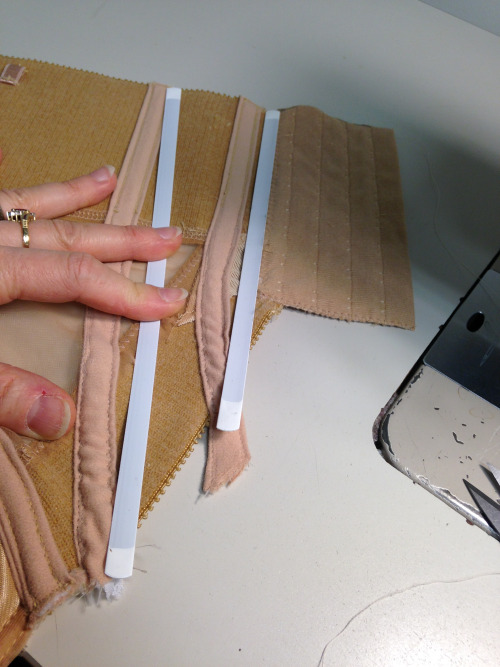
Now you can see that the boning itself will need to be cut down before
we insert it back inside of the covers.
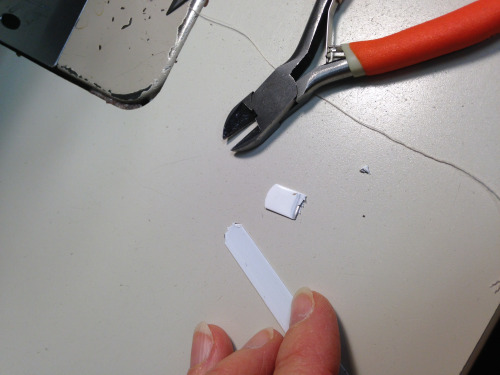
I use these small wire cutters to bend and brake off how much ever it
needs to be shorted and slip the corners so it will not be so
sharp.
Now insert the boning back in to the covers, zigzag across the ends at
the edge of the elastic and cut away any remaining cover. And there you
have it. Now repeat with the other side.
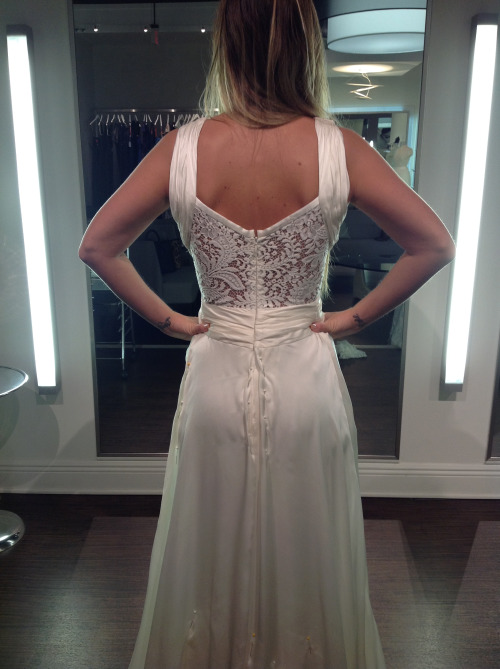
Adding a lace buildup
This is my bride Kelsey. She has a beautiful lace dress and wants to add
a lace buildup to the top. The first thing to do is to get the dress to
fit.
And this is after our first fitting. We need to take in the sides, add
bust darts, take in the seat seams, add a sweetheart neckline, and hem
dress and lace. Once this part is done we can add the lace buildup.
The deep V of the neckline on the lace goes well with the sweetheart
neckline that I added to the dress.
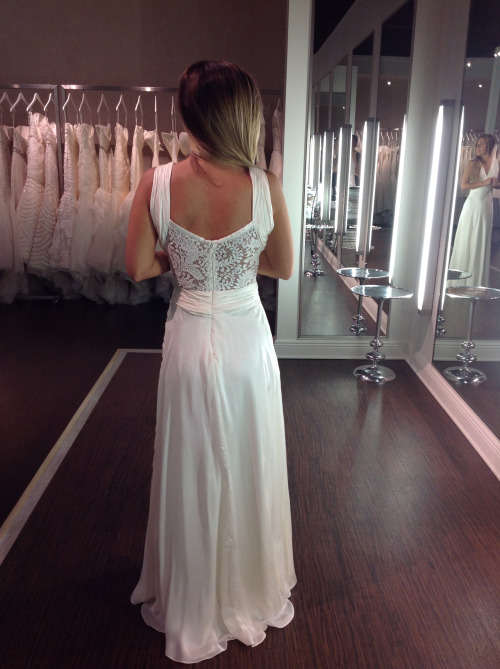
On the back I added buttons and loops to match the back of the dress. I
also added a slight scoop to the back neckline of the lace buildup. For
the sash, Kelsey wanted it to end at the back and become part of the
dress so that her buttons show.
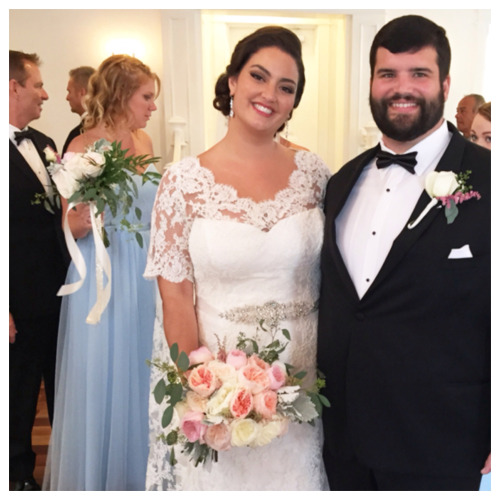
And here she is on her wedding day looking fabulous!
Wedding day photograph by Andi Mans
Photography
Kelsey’s wedding
pics
Wedding dress from Solutions
Bridal
Making a dress fit
This is my lovely bride Kayla. She loved her Marisa
wedding dress that she bought from Solutions
Bridal. There was only one small problem……..her dress was too
small. When it comes to a gown that is too small, there are 2 main
things that you can do. One, see if there is enough room in the seam
allowances to let it out, and two, add a corset to the back. Sometimes,
depending on how a dress is made, there will be room to let it out and
sometimes there isn’t. A lot of times there will be but because the
designer wants to give the dress shape they cut the seam allowance at
the waist curve and so not letting you use any of the extra fabric
that’s inside of the dress.
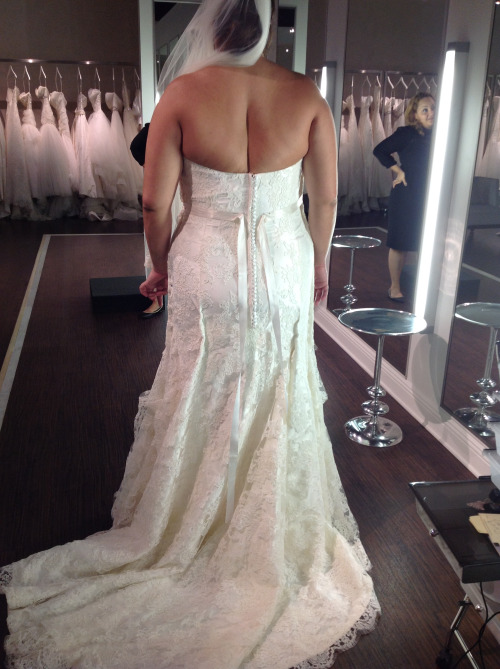
Kayla was also very specific on what else she wanted to change about the
dress. For one thing she wanted to have a clean edge neckline and get
rid of the lace that stuck out over the neckline edge and to add a
buildup to cover her shoulders and arms. But first we had to add the
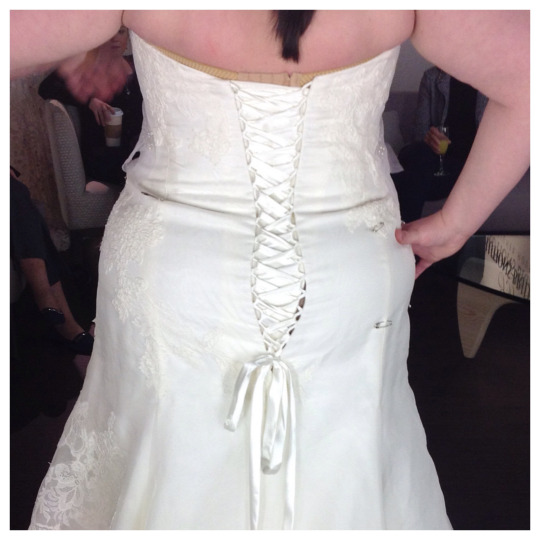
corset to the back so that the dress would sit on her properly.
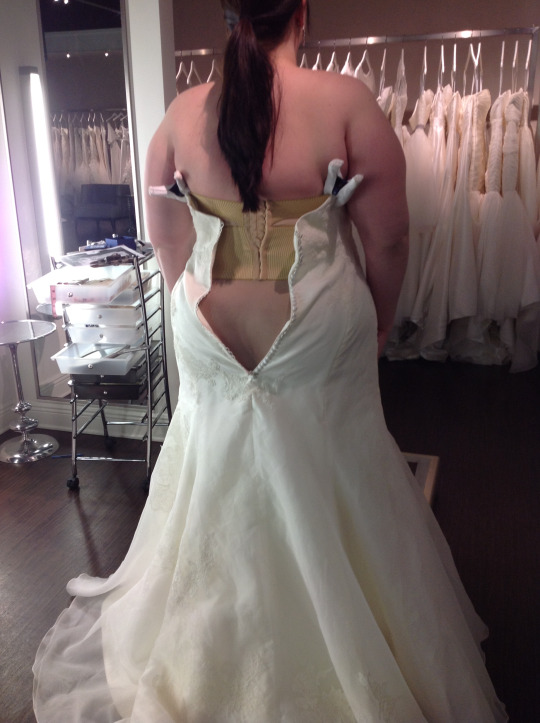
Once the corset was in I could fit the rest of the dress around her. One
thing we had to do was to let out the seams of the dress all around her
hips. As you can see that it is just a bit too snug and pushing the
dress up and making a fold in the back,
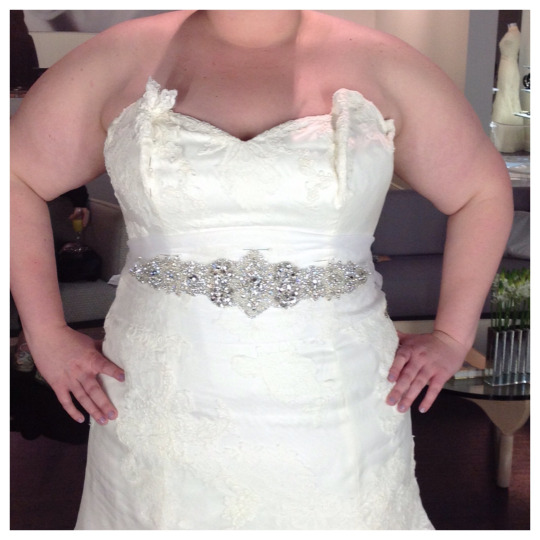
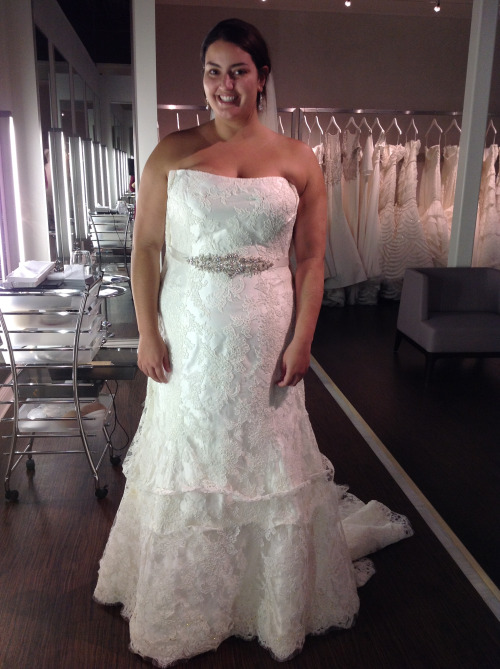
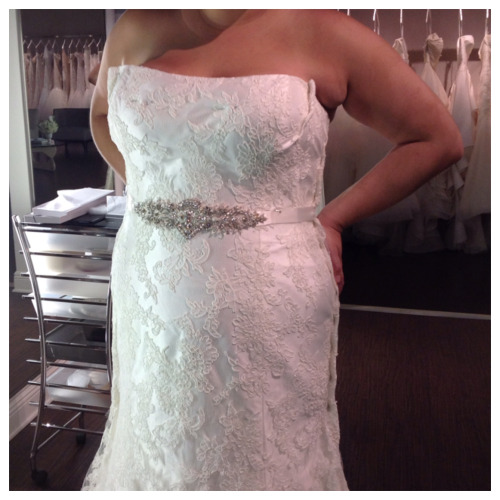
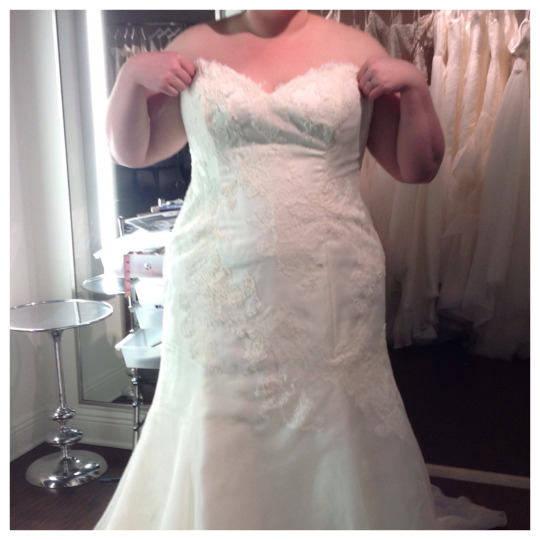
I also took the bust of the dress in at the bust seams because the dress
is very stiff and stuck out away from her body. Kayla also wanted to add
a crystal belt to her waist which accentuated her waistline nicely. You
can also see the difference in having the clean edge neckline verses
with the lave sticking over edge.
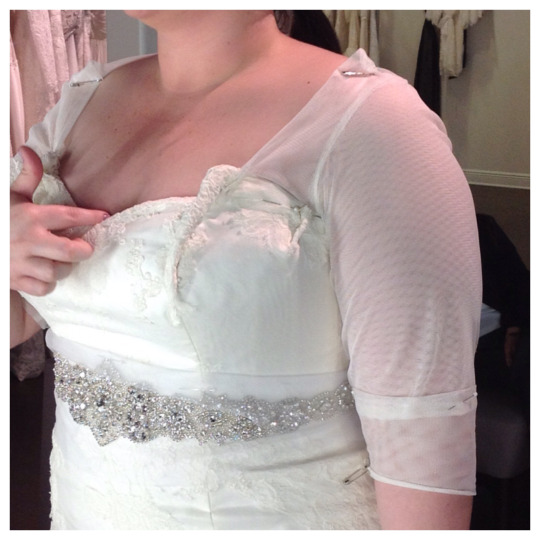
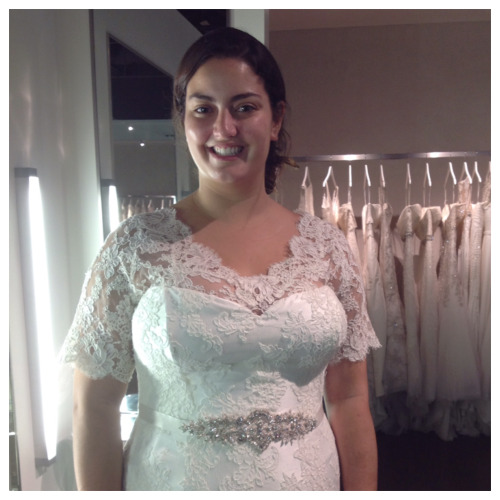
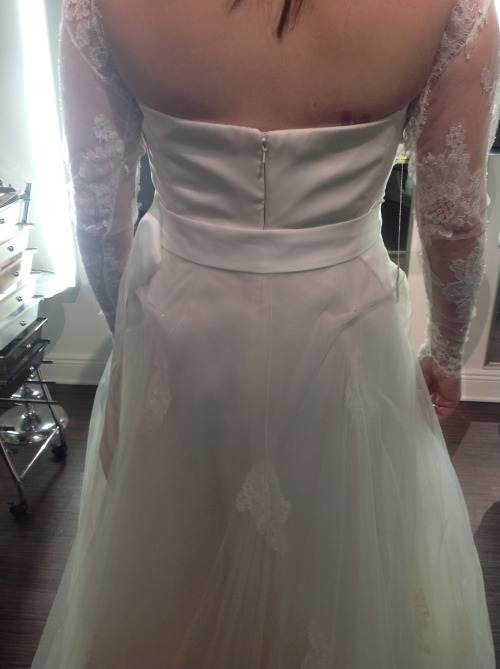
At this time I also fitted Kayla in the added buildup. This was made
with a double layer of english netting that was a good color match for
her dress and gave her the coverage that she wanted. I have also pinned
a side bust dart to give the dress more shape.
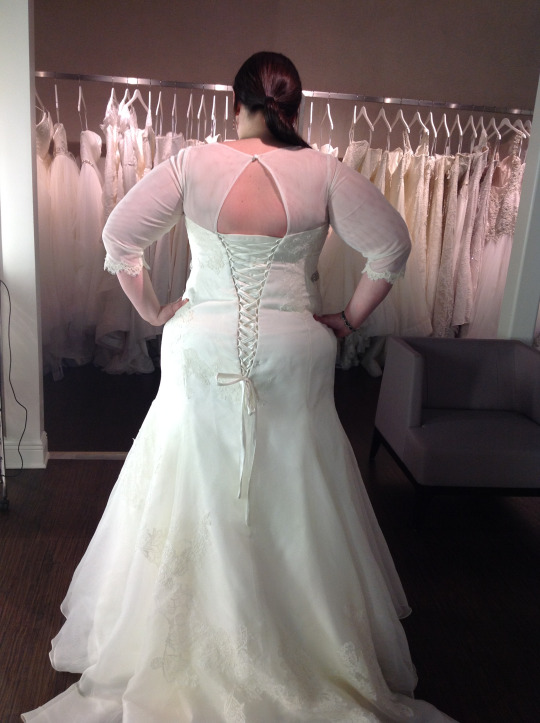
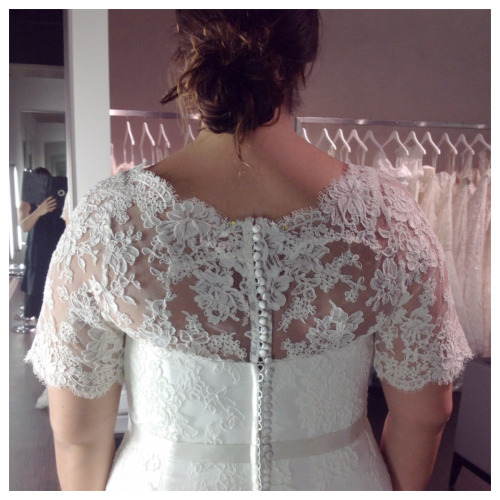
As you can see the dress no fits Kayla properly in the hips. I made this
buildup close at the top so that it will help keep it up on her
shoulders and add a nice detail with the open keyhole in the back.
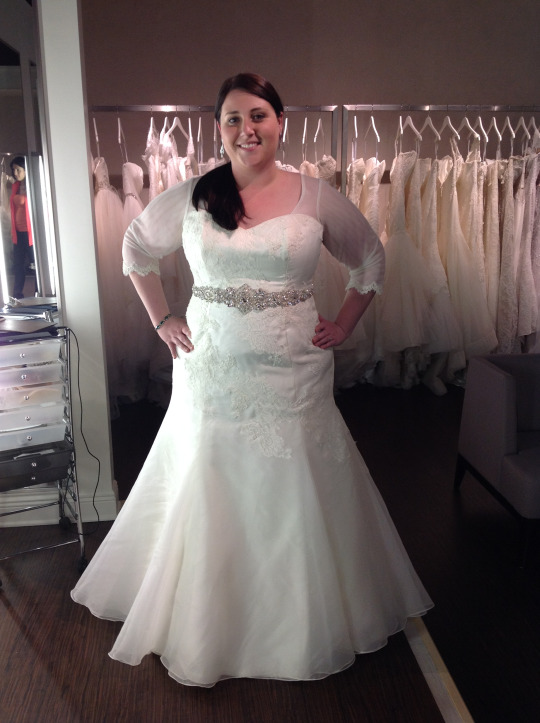
The final result is really stunning once the dress is hemmed and
pressed. With the added details of the crystal belt on her waistline and
lace trim on the cuff of her buildup, Kayla is ready to walk down the
isle.
Can you really alter this?
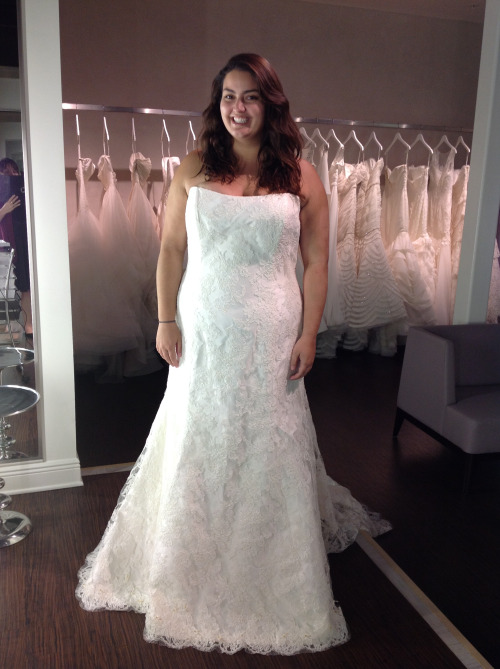
When this bride stepped out of the dressing room with her sample gown, I
knew I was in for a challenge. But I’ve worked on this particular dress
before so I knew that we could accomplish the task. It was just going to
take a few more fittings before the job was done.
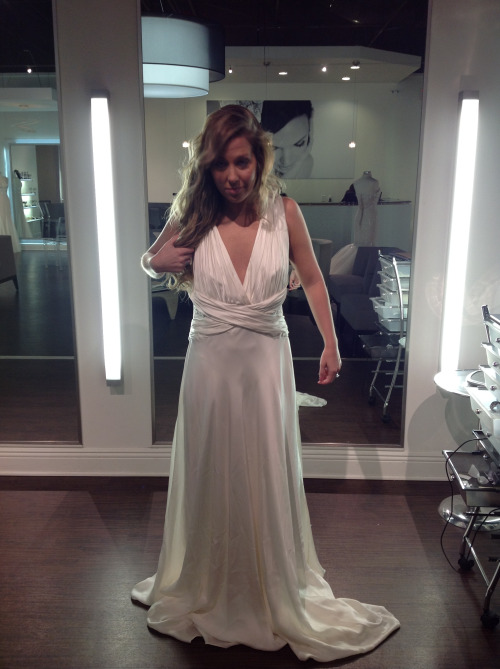
I mean lets face it, she is about a size 00 and the dress was a
12.
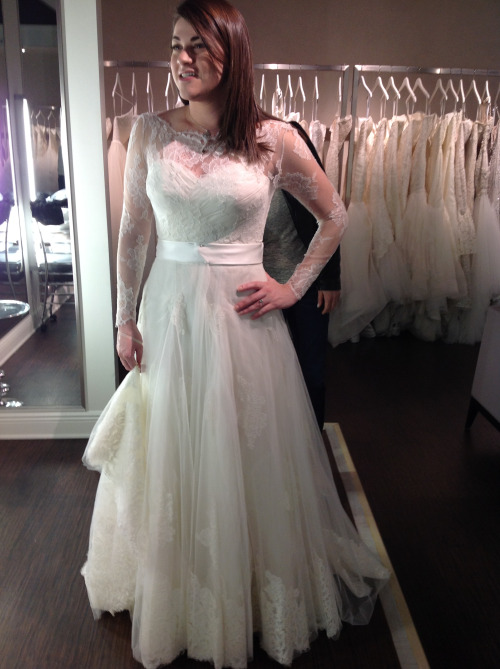
The best way to attack this is from the top down. With this dress I had
to slowly pin it around her so that it would be taken in all over
evenly.
I had to take it up at the shoulders and reshape the front bust because
it was too wide for her small frame.
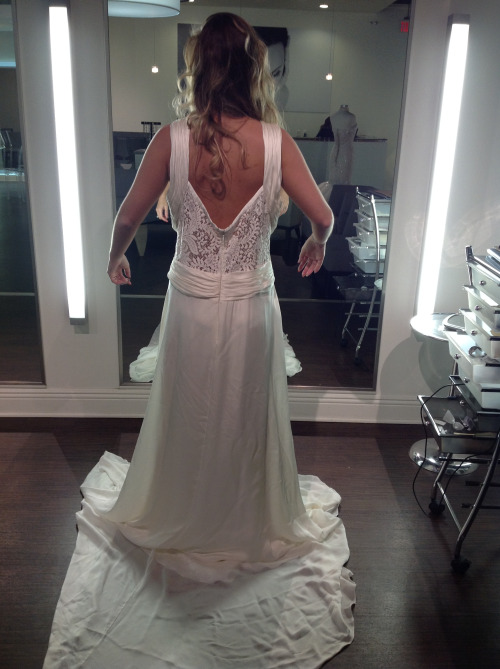
I also took it in down the center back because of the lace panels on the
side and because of how the fabric criss crossed in the mid
section.
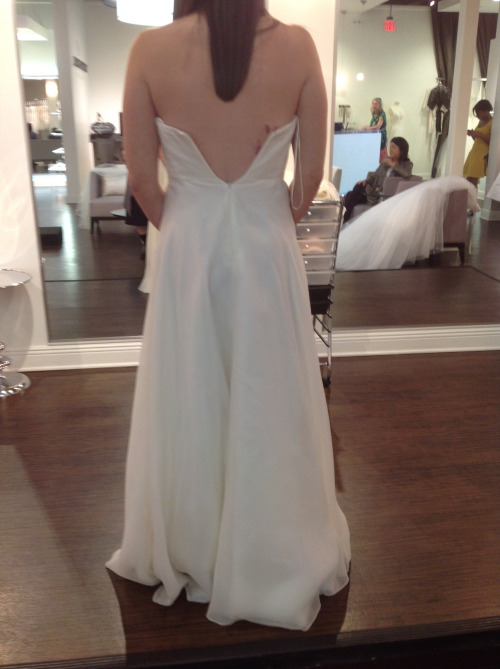
Now you can see her small frame emerge from this large sample dress.
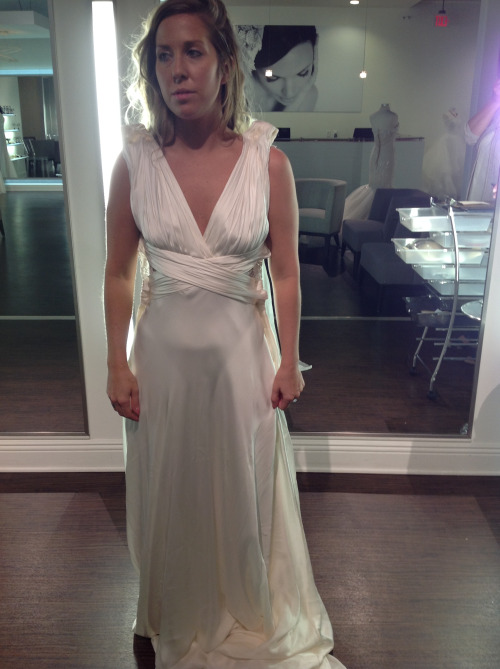
Once the dress was her size, I was able to tweak a few spots and take
the skirt in more down the center back. Lastly, this bride was going to
be wearing this dress to her reception and didn’t want to add a bustle
to the back of it so we hemmed the train of it so it was all the same
length.

I think the final results are amazing! This was such an incredible
transformation. Dress is from Solutions
Bridal.
The alteration process
The alteration process can be a bit challenging unless you really know
what you want the final outlook to be. This bride had a great vision for
what she wanted her wedding dress to look like and that wasn’t easy with
a dress that was too small. When she was trying to decide whether or not
it was do-able enough for her to purchase the sample gown at Solutions
Bridal, or look for a totally different dress, I reassured her
that it would definitely work. I told her that we would need to order
some extra fabric from this particular designer so that the color would
be the same.
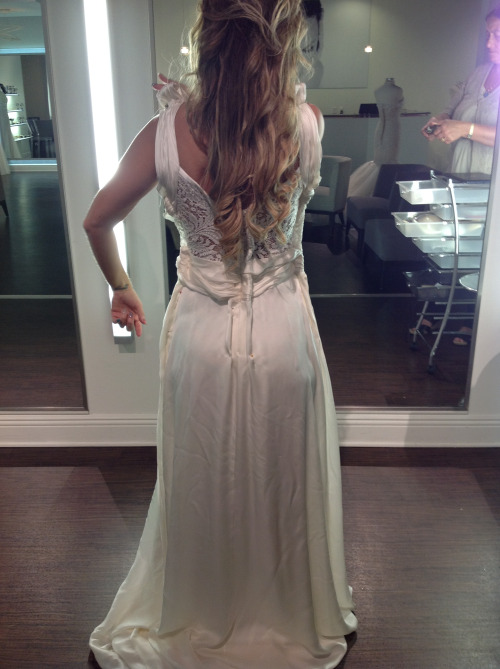
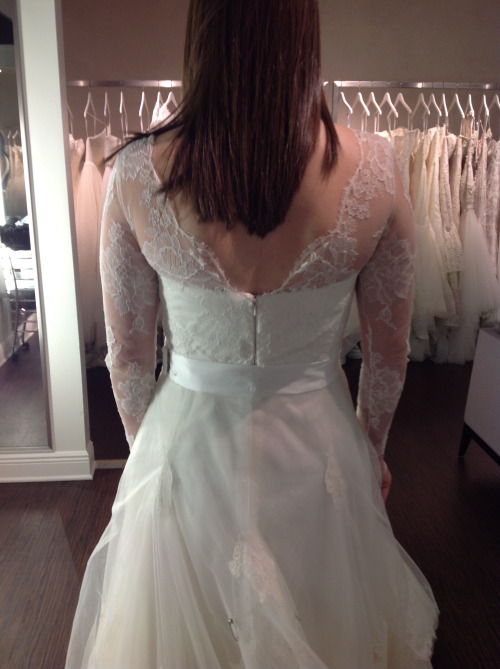
The plan? Make new panels for the back of the bodice. I could tell that
the skirt was cut in the bias and would stretch a bit if the back panels
were bigger. Sure enough it did but little did I know that when I took
the original back panels apart, that I would find that they were made
with 5 different layers of different types of fabric…….all a specific
diamond white shade. If I had one layer too much on the ivory side, it
made the panels stand out and not look consistent. In the end, I was
able to find all that I needed at a local fabric store called The
Sewing Studio.
Now that I got the dress to fit, it was time to work on the Chantilly
lace bolero. This one came from a company called Girl
With a Serious Dream. This company made this bolero via custom
measurements for my bride in that the back, or should I say front of the
bolero is bigger so that when it was turned backwards it would cover
more of her back.
The bolero itself was almost perfect in its fit. The only thing I had to
do was to lower the neckline in the front
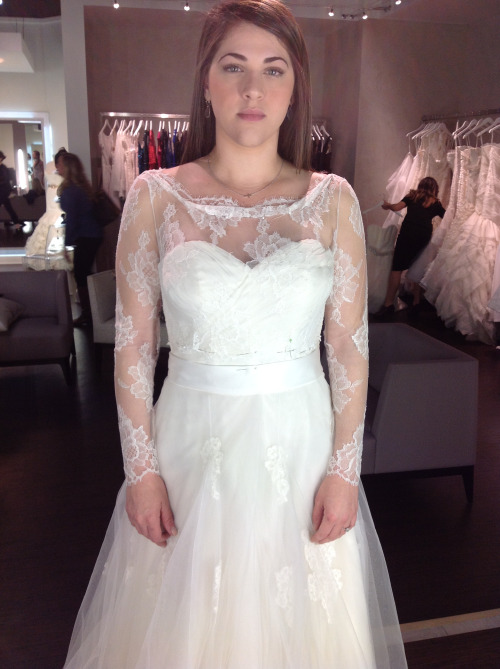
And here is the final result. My bride had also decided to wear a
beautiful tulle and lace over skirt that wrapped around her waist.
Normally it ties, but we made this one hook on the side so it would look
seamless from the front.
Knowing what you want to look like on your wedding day is one thing.
Finding a great seamstress who can execute it well is another. I love
when brides have a grand vision for their dress, and they can
communicate it well to me.